|
|
Getting Started
|
Welcome to our family of Mortgage+Care programs! Here are some quick steps to get you started IMMEDIATELY on your new program. You will soon find that the primary use of Mortgage+Care is to originate and service loans. We have a sample loan already entered into the program so you can explore some of the features now. If you'd like to jump between topics, use the links below. Navigating | Entering a New Borrower | Entering and Editing a Borrower's Info | Entering PaymentsMenu items
Navigating between existing Borrowers or Loans1. Within Mortgage+Care on your computer, click the first icon. Note: The first visit to Mortgage+Care displays the "Select A Borrower" dialog box.
2. Click OK to display Mr. Walters' Borrower Information as shown below.
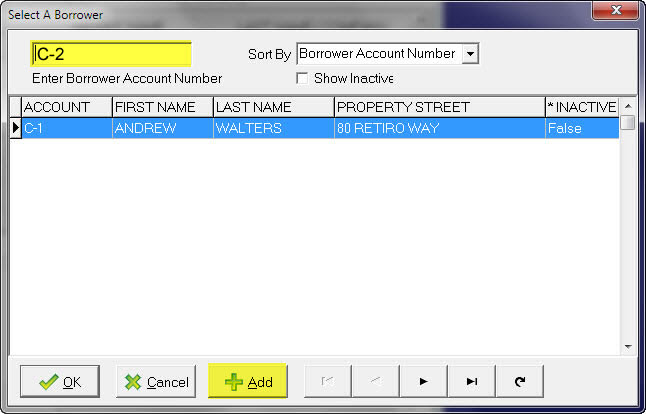
3. To change to another Borrower, click NOTE: To change between Borrower accounts or create a new account from this screen, you will always click Entering a New Borrower or Loan1.Click 2. Enter a NEW account # into the field, as we did below with C-2, then click Add.
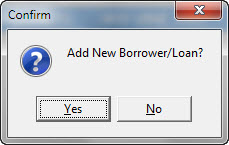
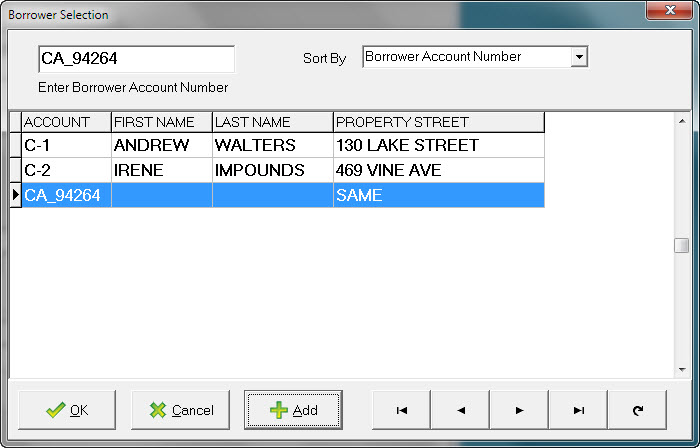
4. Confirm that you want to Add the new Borrower. You are immediately placed into the Borrower Info screen so you can complete all information about the borrower. NOTE: The next time you see your "Select A Borrower" screen, you will see your additional borrowers, as shown below.
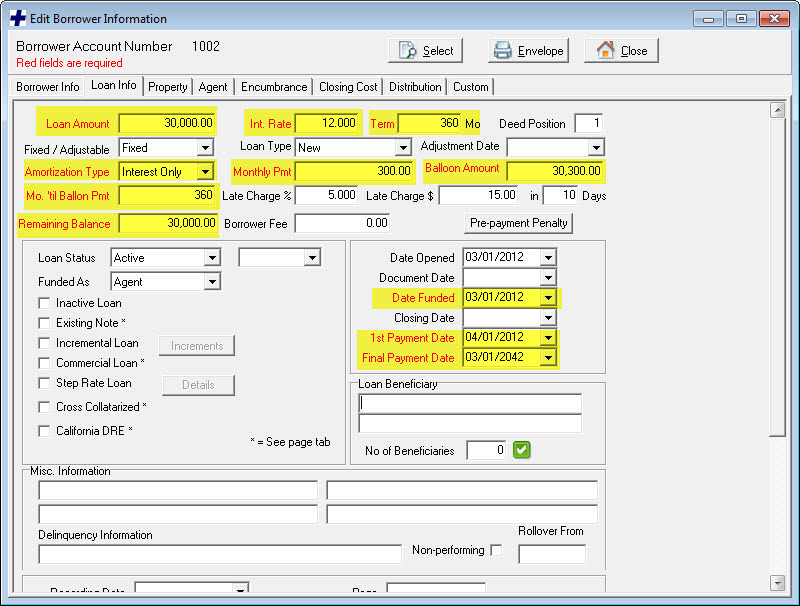
Entering or Editing Borrower (Loan) InformationOnce you have chosen a borrower, there are 8 tabs at the top of the display. By default, you are placed onto the first tab, Borrower Info. NOTE: Before closing a Borrower's Info display, you must complete ALL RED FIELDS, otherwise error messages will display. The tabs that REQUIRE data entry are: Borrower Info, Loan Info, and Distrbution. 1. In the Borrower Info tab, enter information into ALL RED FIELDS, as shown below. Use your tab key on the keyboard to move between fields.
2. On the Loan Info tab, enter information into ALL RED FIELDS, as shown below. Use your tab key on the keyboard to move between fields.
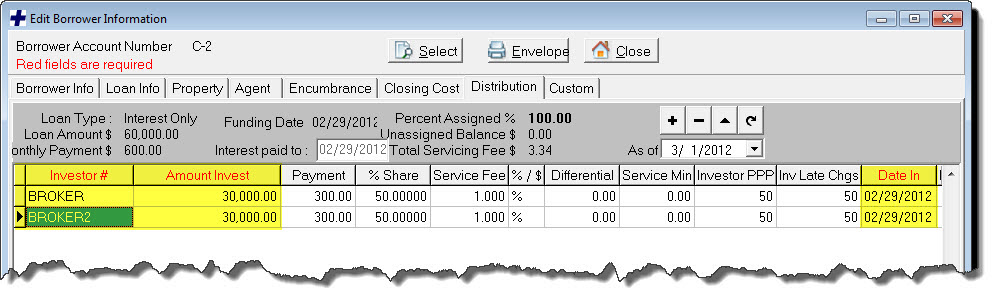
3. If you Close the window before required data is entered, you will see a warning to return and finish entering information. 4. The last screen with RED FIELDS is the Distribution Tab. Visit it now and enter data required. The example below shows a completed Distribution for a $60,000 loan.
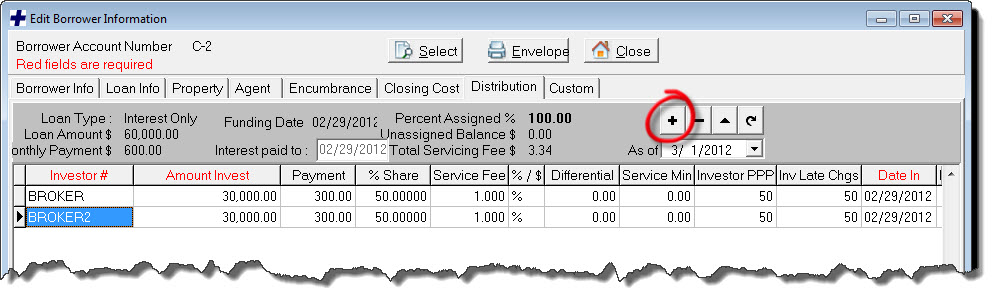
5. To add Investors for your loans, click + as shown below.
6. Choose an Investor and enter all required data that resides in the Red Fields.
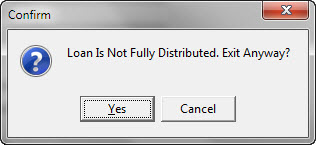
If you have entered all required data, you may Close the window. If there are any outstanding data, you will receive a gentle reminder.
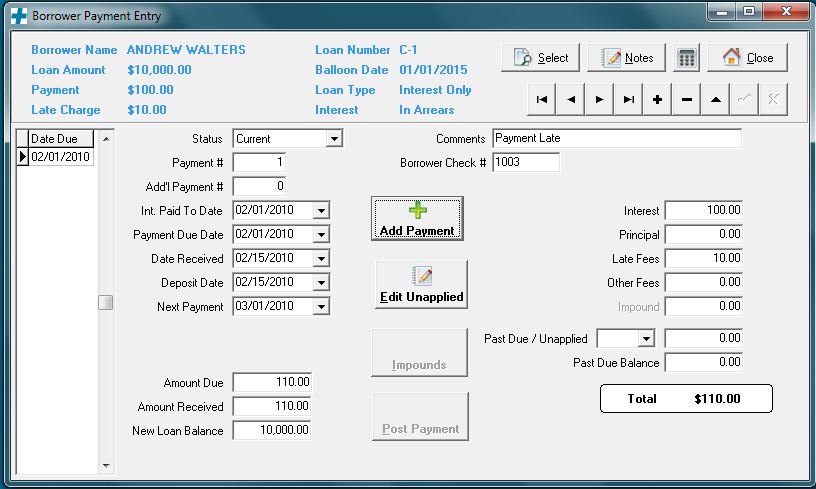
Entering Borrower PaymentsWhen the big bucks start pouring in, you'll need to make sure you enter it precisely and immediately. Here are some explanations on how to do that. 1. Click Here is a sample screen.
3. Click Add Payment 4. A new date is now displayed on the far left side under the Date Due column. An * beside the date shows you which one you are entering data on.
5. When finished, click Post Payment. If there are any errors or missing data, Mortgage+Care will pop-up a dialog box requesting correction. |